
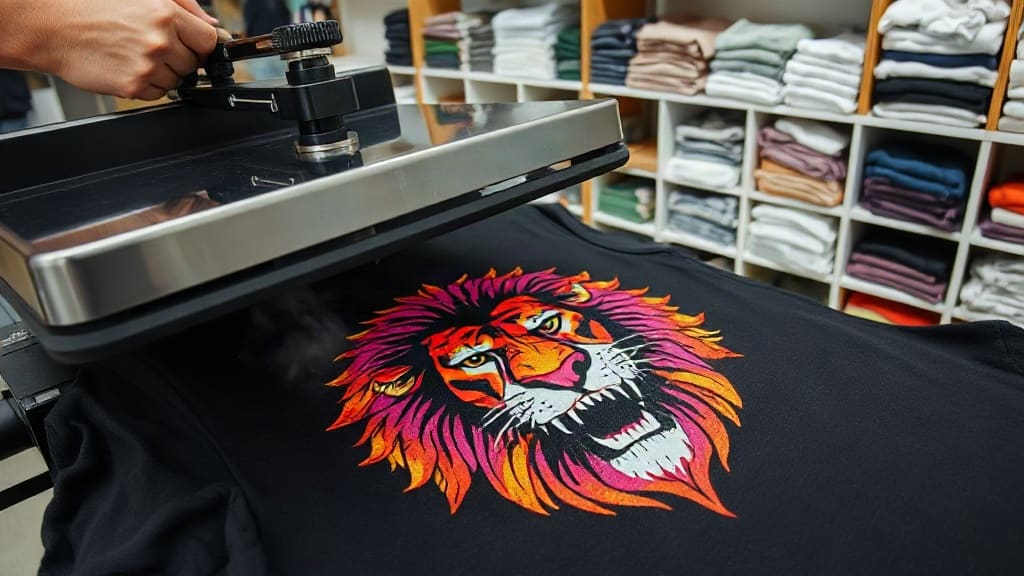
If you’re in the custom apparel business or just love making your own shirts, you’ve probably heard about DTF transfers. This printing method has taken the industry by storm because it offers a flexible and affordable way to create vibrant designs on various fabrics. In this guide, I’ll walk you through everything you need to know about DTF transfers, from what they are to how to apply them like a pro.
What Are DTF Transfers?
DTF transfers (Direct to Film) are a printing method where a design is printed onto a special PET film using a DTF printer, then coated with adhesive powder. After curing, you can transfer the design onto fabric using a heat press. Unlike traditional screen printing or heat transfer vinyl, DTF transfers allow for detailed, full-color designs without needing to separate colors or weed out excess material.
The process is straightforward: print your artwork in reverse onto the film, add the adhesive powder, cure it, and then press it onto your garment. The result is a soft, stretchy, and durable print that can handle repeated washing. Because the design is printed on film first, you can store unused transfers and apply them later, which is a huge advantage for small businesses and DIY enthusiasts.
Why Choose DTF Transfers?
There are several reasons why DTF transfers have become so popular. For one, they work on a wide range of fabrics, including cotton, polyester, blends, and even some nylons. This versatility is a game-changer if you sell different types of apparel. Additionally, DTF prints are known for their vibrant colors and fine details, making them perfect for complex logos, photographs, or designs with gradients.
Another benefit is the ease of use. You don’t need to create screens or cut vinyl, so the setup time is minimal. This makes DTF transfers ideal for on-demand printing or small runs. Also, the transfers themselves have a long shelf life if stored properly, so you can print in bulk and use them as needed, saving production time.
Cost-Effectiveness
Compared to other methods, DTF transfers can be more cost-effective, especially for short runs. There’s no upfront cost for screens, and you can print just one shirt at a time without wasting materials. For businesses, this means lower inventory costs and the ability to offer custom products without minimum order quantities.
What You Need to Get Started
To start making your own DTF transfers, you’ll need a few essential pieces of equipment and materials:
- DTF printer: This is typically an inkjet printer modified to use DTF inks. You can purchase dedicated DTF printers or convert an Epson printer with a DTF conversion kit. The printer uses pigment-based inks (CMYK plus white) to ensure opacity on dark fabrics.
- PET film: This is the release film onto which you print your design. It comes in rolls or sheets and has a coating that holds the ink and releases it during transfer.
- Adhesive powder: A hot-melt adhesive powder that you apply to the printed film. This powder melts during pressing, bonding the design to the fabric.
- Heat press: A heat press machine is essential for applying the transfer. It provides consistent temperature and pressure to ensure a strong bond.
- Curing oven or heat source: After applying the powder, you need to cure it to set the adhesive. Some people use the heat press itself for this step, but a dedicated curing oven or a heat gun can also work.
- DTF inks: High-quality pigment inks designed specifically for DTF printing. They need to be water-based and compatible with your printer.
If you’re just starting, you might consider purchasing a starter kit that includes the film, powder, and inks. This can help you get familiar with the process without investing a lot upfront.
Step-by-Step Process for Making DTF Transfers
Creating a DTF transfer involves several steps, each crucial for achieving a high-quality final print. Here’s a detailed walkthrough:
1. Design and Print
First, you need to create your design using graphic software. Remember to mirror the image horizontally because you’ll be printing it onto the film in reverse. Once your design is ready, load the PET film into the printer and print using the DTF settings. The printer will lay down the white ink first (on dark garments) and then the CMYK colors. Ensure that your artwork has a white underbase for dark fabrics to keep colors vibrant.
2. Apply Adhesive Powder
While the ink is still wet, you need to cover the printed area with adhesive powder. You can do this manually by sprinkling the powder over the design, but using a powder shaker or a dedicated applicator is more efficient. Make sure the entire printed area is covered; then, shake off the excess powder. This step is critical because the powder is what bonds the ink to the fabric.
3. Cure the Powder
Next, you need to cure the adhesive powder. This can be done by placing the film on a heat press at a low temperature (around 160°C or 320°F) for a few seconds, or using a curing oven. The goal is to melt the powder slightly so it sticks to the ink and forms a solid layer. Don’t overdo it, as the powder may bleed or cause the transfer to stick to the film.
4. Store or Use Immediately
Once cured, your DTF transfer is ready to use. You can either press it onto a garment right away or store it for later. If storing, keep it in a cool, dry place, and avoid folding the printed area to prevent cracking.
How to Apply DTF Transfers to Garments
Applying the transfer is where the magic happens. Here’s how to do it correctly:
Pre-Press Your Garment
Before placing the transfer, pre-press your garment to remove moisture and wrinkles. This helps the transfer adhere better. Set your heat press to the recommended temperature, usually around 160°C (320°F) for most fabrics, but check the manufacturer’s guidelines.
Position and Press
Place the transfer with the printed side facing down on the garment. Cover it with a Teflon sheet or parchment paper to protect the film and your heat press. Apply firm pressure for about 15-20 seconds. The exact time and pressure may vary, so test on a sample first.
Hot Peel or Cold Peel?
Some films are designed for hot peeling, where you remove the film immediately after pressing, while others require cold peeling, where you wait for it to cool down. Follow the instructions that come with your film. Generally, cold peel gives a shinier finish, while hot peel is matte. For best results, use a test print to see which works for you.
Tips for Perfect DTF Transfers Every Time
To get consistent, high-quality results, keep these tips in mind:
- Use high-quality images: Your design needs to be at least 300 DPI to avoid pixelation. Since DTF can capture fine details, a crisp image is essential.
- Calibrate your printer: Regular nozzle checks and cleaning will prevent banding and ink clogs. Keep your printer in good condition.
- Shake the powder well: Ensure the adhesive powder is evenly distributed. Use a sieve or shaker for uniform coverage.
- Test on similar fabric: Different fabrics absorb ink differently. Always test on a piece of the actual garment fabric to adjust pressure and time.
- Store transfers flat: If you’re not using them immediately, store them flat in a dry place. Avoid moisture, which can cause the powder to clump.
- Press with medium pressure: Too much pressure can cause the design to spread, while too little might not bond properly. Most heat presses have adjustable pressure; aim for medium.
Common Mistakes and How to Avoid Them
Even experienced printers run into issues. Let’s look at a few common problems:
Poor Adhesion
If the transfer peels off easily, it could be due to insufficient pressure, low temperature, or not enough adhesive powder. Increase the pressure and temperature slightly, and ensure the powder is applied evenly. Also, make sure the garment is pre-pressed to remove moisture.
Cracking
Cracking often happens when the transfer is stretched after application or if the ink layer is too thick. To prevent this, use a stretchable film and avoid over-curing. Also, allow the transfer to cool completely before handling.
Color Fading
Fading can occur if the inks are not cured properly or if you use low-quality inks. Make sure to cure at the right temperature for the correct duration. Also, always use DTF-specific inks that are designed to withstand washing.
DTF Transfers vs. Other Methods
How do DTF transfers compare to screen printing, vinyl, and sublimation? Each method has its pros and cons, but DTF stands out for its versatility and ease of use.
Screen Printing
Screen printing is great for large orders because it’s cost-effective at scale, but it requires a significant setup cost per design. DTF is perfect for small batches and full-color designs without the setup hassle.
Vinyl Cutting
Vinyl is limited to solid colors and simple shapes, and weeding can be tedious. DTF can handle gradients, small text, and intricate details, making it superior for complex designs.
Sublimation
Sublimation works only on polyester fabrics and leaves the white areas white. DTF works on cotton as well as polyester, and you can print white, which makes it more versatile.
Frequently Asked Questions
Can DTF transfers be reused or removed?
Once applied, DTF transfers are permanent and cannot be reused. However, if you make a mistake during application, you might be able to remove it with a heat press and adhesive remover, but the fabric may be stained or damaged.
How many washes do DTF transfers withstand?
With proper application and care, DTF transfers can last for 50 or more washes. To extend their life, wash garments inside out in cold water and avoid using bleach. Tumble dry on low or hang dry.
What fabrics are best for DTF transfers?
DTF transfers work best on cotton, polyester, and blends. They also adhere well to materials like denim, canvas, and even leather, though you might need to adjust temperature and pressure for delicate fabrics.
Do I need a special printer for DTF transfers?
Yes, you need a printer that can handle DTF inks and has a white ink channel. Many people modify Epson EcoTank printers, but there are also dedicated DTF printers available. Using the right printer ensures consistent quality and prevents clogs.
Can I print DTF transfers at home?
Absolutely! With the right equipment, you can set up a small DTF operation at home. You’ll need a DTF printer, a heat press, and a well-ventilated area for curing. It’s a great way to start a side business or create custom gifts.
Final Thoughts
DTF transfers have opened up a world of possibilities for custom apparel. They’re easy to learn, versatile, and produce professional-looking results. Whether you’re a hobbyist or a business owner, investing in DTF technology can streamline your production and expand your product offerings. Start with a small setup, practice on scrap fabric, and soon you’ll be producing stunning prints that your customers will love.